Background
In May, I detailed our strategy for bundling JavaScript interactives into standard webpacks. We are now the proud authors of over a dozen webpacks. The interactives embed seamlessly into our static learning modules, e.g. the Older Adults Dresser Activity. A gallery, authored by my colleague Zarina Mustapha, in set up in Hugo.
Test, test, test
Here at CTL, we are passionate about delivering high quality code that adheres to community standards. Our quality control arsenal includes unit tests, code reviews, static analyzers, style checkers, and continuous integration. Our Django/Python projects have excellent unit test coverage.
One noticeable testing gap is the JavaScript supporting our web applications. All JavaScript is subject to static code analysis (JSHint) and style checks (JSCS). Applications with complex client-side interactions are sometimes covered by Selenium tests. But a standard client-side testing habit has proved elusive. As part of the interactives migration effort, I wanted to settle on frameworks for unit tests and client-side tests, i.e. tests that rely on the presence of the DOM, then start writing tests.
Note: I’m using the Older Adults Dresser Activity interactive as a demo throughout this post. This interactive was designed to convey the daily medical and social issues of older adults. This interactive uses Backbone.js as a lightweight MVC layer. Full code is available on Github.
Choosing a Test Framework
JavaScript testing utilities are proliferating. Using NPMCompare, I reviewed the most (currently) popular players Jasmine, Mocha, Facebook’s Jest, Tape and Karma.
The npm comparison shows Mocha as the overall leader. “Mocha has been out there for longer (since 2 years ago), it also has more daily downloads, more weekly downloads, more monthly downloads, more stars on Github, more followers on Github and more forks.”
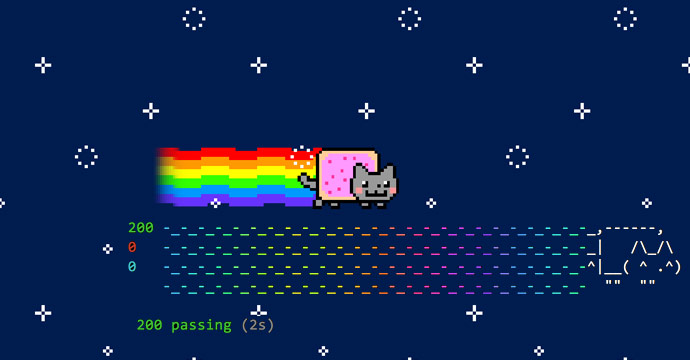
A few other compelling features sealed the choice: an easy-to-read BDD style interface, asynchronous support via callback or [Promise](https://developer.mozilla.org/en-US/docs/Web/JavaScript/Reference/Global_Objects/Promise and a Nyan cat test reporter. Mocha does require an additional assertion library, so I went with Chai for its versatile assertion styles.
Unit Tests
The interactives code is generally broken up into models and views. The models are excellent test targets – small discrete functions with no DOM requirements. Many step-by-step introductions walk through unit testing with Mocha, like here. I added the mocha and chai dependencies to my package.json. And, I followed the pattern of creating a test directory, with a model-test.js.
project
  |-- test
  |   |-- model-test.js
And added the following to package.json:
scripts {
    "test": "mocha -R nyan",
}
And wrote a very, very simple test:
...
describe('Models', function() {
    it('ItemList', function() {
        var data = [{'name': 'item'}];
        var a = new models.ItemList(data);
        var output = a.toTemplate();

        assert.equal(output.length, 1);
        assert.equal(data[0].name, output[0].name);
    });

});
...
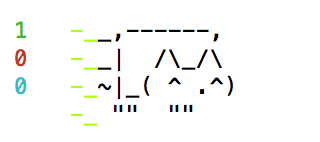
Type npm test and voila. The unit tests run and the Nyan cat moves across the screen.

Client-side tests
Configuring and writing a unit tests took an hour. Putting together DOM-based view tests that could run through the command line took days.
The basic idea is to load a webpage, then interact and introspect the resulting DOM. Judging by the numerous blog posts and pleas for help on StackOverflow, an accepted common solution has not yet emerged. The fragmented world of JavaScript frameworks and testing tools complicates everything. Adding webpack to the mix boosts the pain. I ended up cobbling together an approach after much trial and error. I’m going to skip the heartache, and just review my final approach.
Dependencies
You’ll need a few npm packages to make this happen.
- phantomjs-prebuilt - PhantomJS is a headless WebKit with a JavaScript API. This library is essential for any tests requiring html rendering and JavaScript interaction.
- mocha-phantomjs - mocha-phantomjs runs on top of PhantomJS to translate tests to webpage interaction.
- jquery - for easy DOM manipulation.
Get started
You’ll need a test .html file for PhantomJS to load.
project
  |-- test
  |   |-- view-test.html
<html>
<head>
    <meta charset="utf-8">
    <!-- encoding must be set for mocha's special characters to render properly -->
    <link rel="stylesheet" href="../node_modules/mocha/mocha.css" />
</head>
<body>
    <div id="mocha"></div>
    <script src="../node_modules/mocha/mocha.js"></script>
    <script src="../node_modules/chai/chai.js"></script>
    <script>
        mocha.ui('bdd')
        expect = chai.expect
    </script>
    <!-- there is MAGIC here! keep reading -->
    <script src="../dist/testBundle.js"></script>
    <script>
        mocha.run()
    </script>
    <div class="steps"></div>
    <div class="infographic-container"></div>
</body>
</html>
And a (very simple) test that interacts with the DOM.
project
  |-- test
  |   |-- view-test.js
    describe('InfographicView', function() {
        it('initialized', function() {
            assert.isTrue(jQuery('.progressbar-set-initial').is(':visible'));
        });
    });
Where the magic happens
If you noticed, the view-test.html file includes testBundle.js. The webpack
can only be tested if all the code AND tests are bundled up and loaded into the test page.
Creating a testBundle just requires a bit of configuration.
Add a test.webpack.config.js that pulls in view-test.js and outputs testBundle.js.
module.exports = {
    entry: './test/view-test.js',
    output: {
        filename: './testBundle.js'
    },
    ...
};
Update your package.json with the build directive and the test targets. I broke the unit and client-side tests into separate commands.
"scripts": {
    ...
    "test": "npm run test-unit && npm run test-client",
    "test-unit": "mocha -R nyan test/model-test.js",
    "test-client": "mocha-phantomjs -R nyan dist/view-test.html",
    "build": "webpack && webpack --config test/test.webpack.config.js"
  },
Run It
npm build to create the bundle. npm test to run all the tests. Or, you can open test/view-test.html in a browser to see the tests run.

Synchronicity
Easy right? Well, that example was. But, the real point is to verify user interaction not just the page render.
In this example, a user clicks a dresser item and a modal appears with an item description. This test likely will fail.
it('click candies', function() {
    var elt = jQuery('.item-image-candies');
    jQuery(elt).click();
    assert.isTrue(jQuery('#item-modal').is(':visible'));
});
Why would it fail? A click is an asynchronous event. A user clicks a button, an event is fired, a handler is executed. After the click, the test needs to hang out and wait for the click flow to complete and the modal appear. How to do that?
Long story short, I ended up just writing a little wait function based on the PhantomJS example waitfor.js, and leveraged Mocha’s asynchronous testing support. Longer term, I think CasperJS is a path to explore. But, I had really, really spent enough time on this… Here’s what the test looks like now.
function waitFor(testFx, doneFx, millis) {
    var timeout = millis ? millis : 3000; // Default Max Timeout is 3s
    var start = new Date().getTime();

    var interval = setInterval(function() {
        var condition = testFx();

        if (condition) {
            clearInterval(interval);
            doneFx();
        } else if ((new Date().getTime() - start >= timeout)) {
            clearInterval(interval);
            doneFx(new Error('timeout occurred'));
        }
    }, 250); //< repeat check every 250ms
}
it('click candies', function() {
    var elt = jQuery('.item-image-candies');
    jQuery(elt).click();

    waitFor(function() {
        jQuery('#item-modal').is(':visible');
    }, done);
});
Summary
Navigating the testing complexities of Webpack + Mocha + PhantomJS took some time, but I’m happy to have a way forward. Good luck with your own testing efforts. I’d love to hear about any tricks or easier paths. Now I have a lot more tests to write…
Helpful Links
Printed from: https://compiled.ctl.columbia.edu/articles/standalone-interactives-testing/

