Study the end credits of just about any film, TV show, or documentary, and you’ll get a sense of the labor involved in professional media production. Cameras and microphones must be set up, lights need to be positioned and adjusted to illuminate the subject, and the content has to be captured in an aesthetically pleasing way all while maintaining an aggressive production schedule. This requires planning, technical skills, and many hours of dedicated work time.
But what if these preparatory steps were turnkey? A single set up with cameras, microphones, and lights positioned and ready for “Action”? What if this level of production was readily available to instructors for creating course content without the need for a full production team? This was the impetus behind the design of the CTL DIY studios. The two CTL studio spaces, located in separate campus locations, offer instructors professional-level recordings without all of the steps necessary to plan, build, and operate the equipment. Accomplishing this takes forethought and much consideration. So, what does it take to put a DIY studio together? This post proposes four things to keep in mind when considering a DIY Recording Studio for instructional content.
1. Simplify the set-up
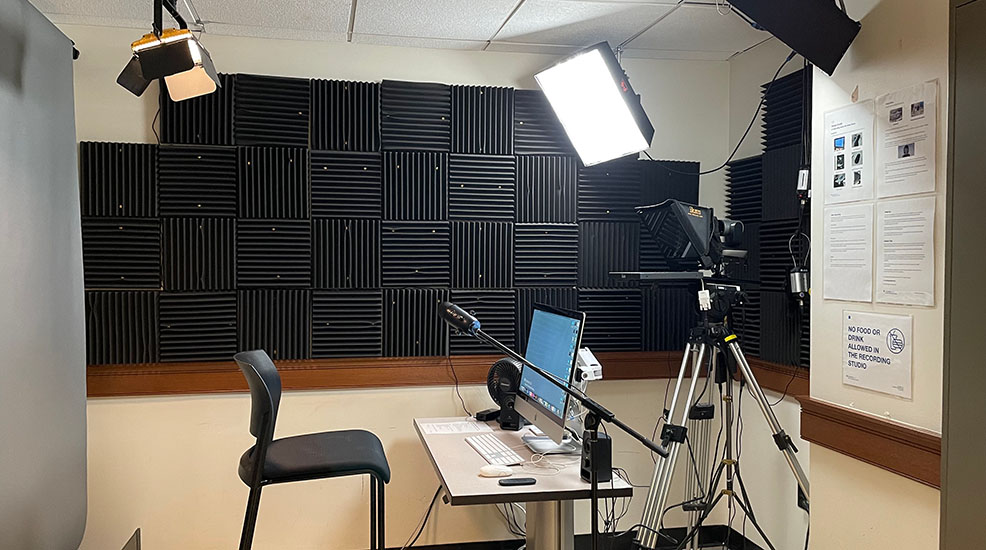
Production is a very demanding process. HD and even 4K cameras in modern consumer laptop and mobile devices make it deceivingly easy to capture acceptable results. But for a truly professional look, a more elaborate setup is required. Our DIY studios use a traditional three-point lighting design with LED production lights to enhance the subject and create a three dimensional appearance in a two dimensional medium. The lights feature manual adjustments for color temperature and light intensity, which can evoke a different mood or atmosphere if needed.
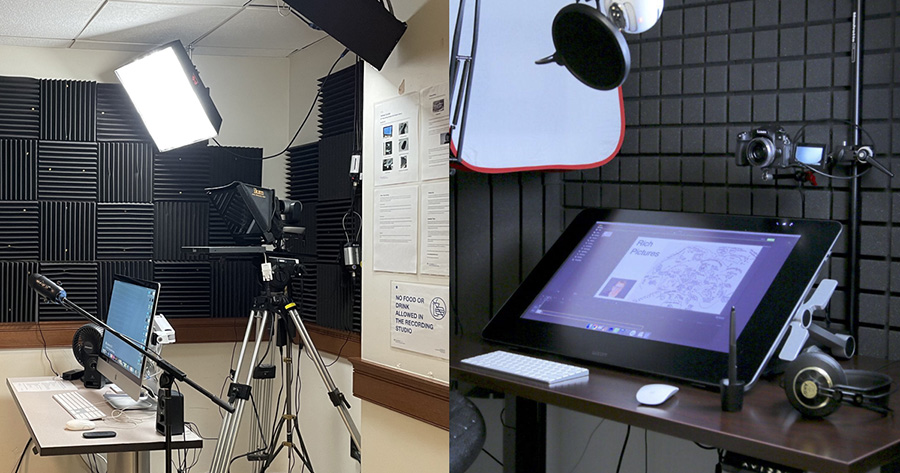
The studios also include neutral tone backdrops that create a studio aesthetic and draw viewers’ attention to the on-camera subject. For audio, we mounted a broadcast quality microphone on a stand with an adjustable pickup pattern, which works great for podcasts. An optional high fidelity lapel microphone (known as a lavalier or “lav” mic) provides a more dynamic sound quality, but may require assistance setting up. The Butler 204 Studio is equipped with a 4K PTZ camera with pan, tilt, zoom, and focus functions easily adjusted with a remote. The CUIMC Studio offers a 4K camera that is adjusted manually without a remote. Both DIY recording studios eliminate the commitment in time and resources by having all of this gear positioned and ready to go once powered on, rather than built out by our media team each time a recording is scheduled.

Our DIY studio is equipped with lighting, backdrop, 4K camera, and a computer that are already set up for users to use with minimal assistance from the media team.
2. Make it user friendly
Even with prep work eliminated, operating the gear can be intimidating for some users unfamiliar with production. Aim to alleviate the anxiety some might feel by reducing the steps necessary to power on the equipment and record their content. We minimized the controls and distilled the process down to two buttons in the Butler 204 Studio: one button to power up the computer, and one button for the power strip which switches on the media capture equipment. From there on it’s a simple matter of checking that the camera and microphone are selected as the video and audio source in the recording program, making sure the camera is framed correctly with the remote control, and pressing record.
3. Support with documentation
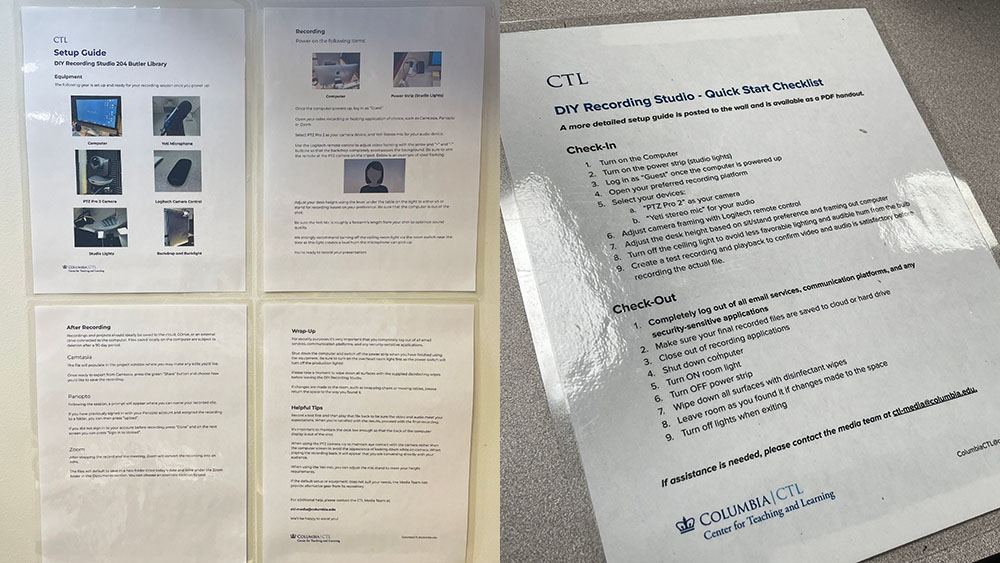
Even if a user is confident with AV technology, referring to a list of recording best practices can be helpful. We posted on the studio wall a laminated best practices guide with easy to follow numbered steps for setup. These documents are also available on the CTL website. Equally important are learning design best practices for creating purposeful and engaging instructional content. The media team designed an instructor reservation form with feedback from learning designers to make sure they are integral to the “intake” process.

Documentation on recording best practices are available to the users in our DIY studios.
4. Streamline the process
Ultimately the idea behind the DIY Studios is to allow instructors with any level of skill or technical expertise to record high quality media with ease and convenience. Streamlining the reservation/pre-production process, along with simplified equipment controls, goes a long way to make things happen smoothly.
A reservation form in the style of a checklist greatly improves our internal fielding process by removing back-and-forth communication. When a user submits a request, the reservation generates an automatic notification to the media team, who in turn can make themselves available to support if needed and grant access to the space for the instructor. The media team will then coordinate with a learning designer to ensure effective and purposeful content creation for students and courses.
To further improve efficiency, we’re developing an integration with our ticketing system which will automatically generate a ticket for learning designers once a request for the studio has been submitted. This way both the media and learning design teams will instantly be notified negating lengthy email exchanges to provide recording details.
Improvement of our DIY recording studios is an ongoing process based on feedback from our users. It is the hope of the media team that as the studios evolve to continually provide a better user experience, they will continue to attract a greater number of instructors to produce media for their courses.
Printed from: https://compiled.ctl.columbia.edu/articles/faculty-diy-studio-setup/

